
Hey Builders!
I just got back from a short weekend trip to New York City. I decided to spend a bit of my time searching for Gunpla stores. When I was younger, I used to pick up a few kits while visiting Chinatown with my family. That is how I ended up getting my HG 1/100 Altron, NG 1/144 Collector's Blaze Zaku Phantom, HG 1/144 08th MS Team GM, and NG 1/100 Strike Freedom.
Most of these broke...
I haven't been back since 2009, and I heard a lot of the stores I used to visit had closed down. I ended up finding two stores, Da Shop and Image Anime based on references from Reddit.
Da Shop was located in Chinatown, across from the Elizabeth Center (where I used to get my kits). Their prices were pretty marked up, so I didn't pick anything up. I picked up the Astraea from Image Anime which was closer to my hotel, and I could walk there. It was only a $3 mark up from the Amazon price, $6 including taxes.
Parts
The kit comes with 12 Runners, A, C, E, F, H, I, J, K, L, M, SB, and PC. Many of these runners draw from the NG 1/100 Exia and looking at the leftover parts, you may be able to turn this guy into its successor. It comes with one small sticker sheet as well.
Weapons and Manipulators

Manipulators:
2x Open
2x Holding
Weapons:
1x GN Beam Rifle
1x GN Launcher
1x Proto GN Sword
2x GN Beam Sabers with 2x Short Blades and 2x Long Blades
1x Shield
Size Comparison

Here is the Astraea next to my other 1/100 Gundam from 00, the MG 00 Raiser. The 00 is noticeably taller, and also more slender than his No Grade predecessor. The legs on the Astraea are a bit bulkier, and not as sleek as the 00.
Articulation
Arms:


The arms bend fairly nicely, but in the 3rd picture, the arm will pop out at the elbow if you bend it all the way 180. The shoulders are independent of the arms, similar to the MG 00, and can rotate freely from the arms.
Legs/Ankles:


The legs also have fairly good bend, but cannot achieve a full split. The knee has a double joint which allows it to bend farther. The ankles are on ball joints and has some side to side movement. The foot is in two pieces, where the toe can bend forward via polycap.
Color/Quality

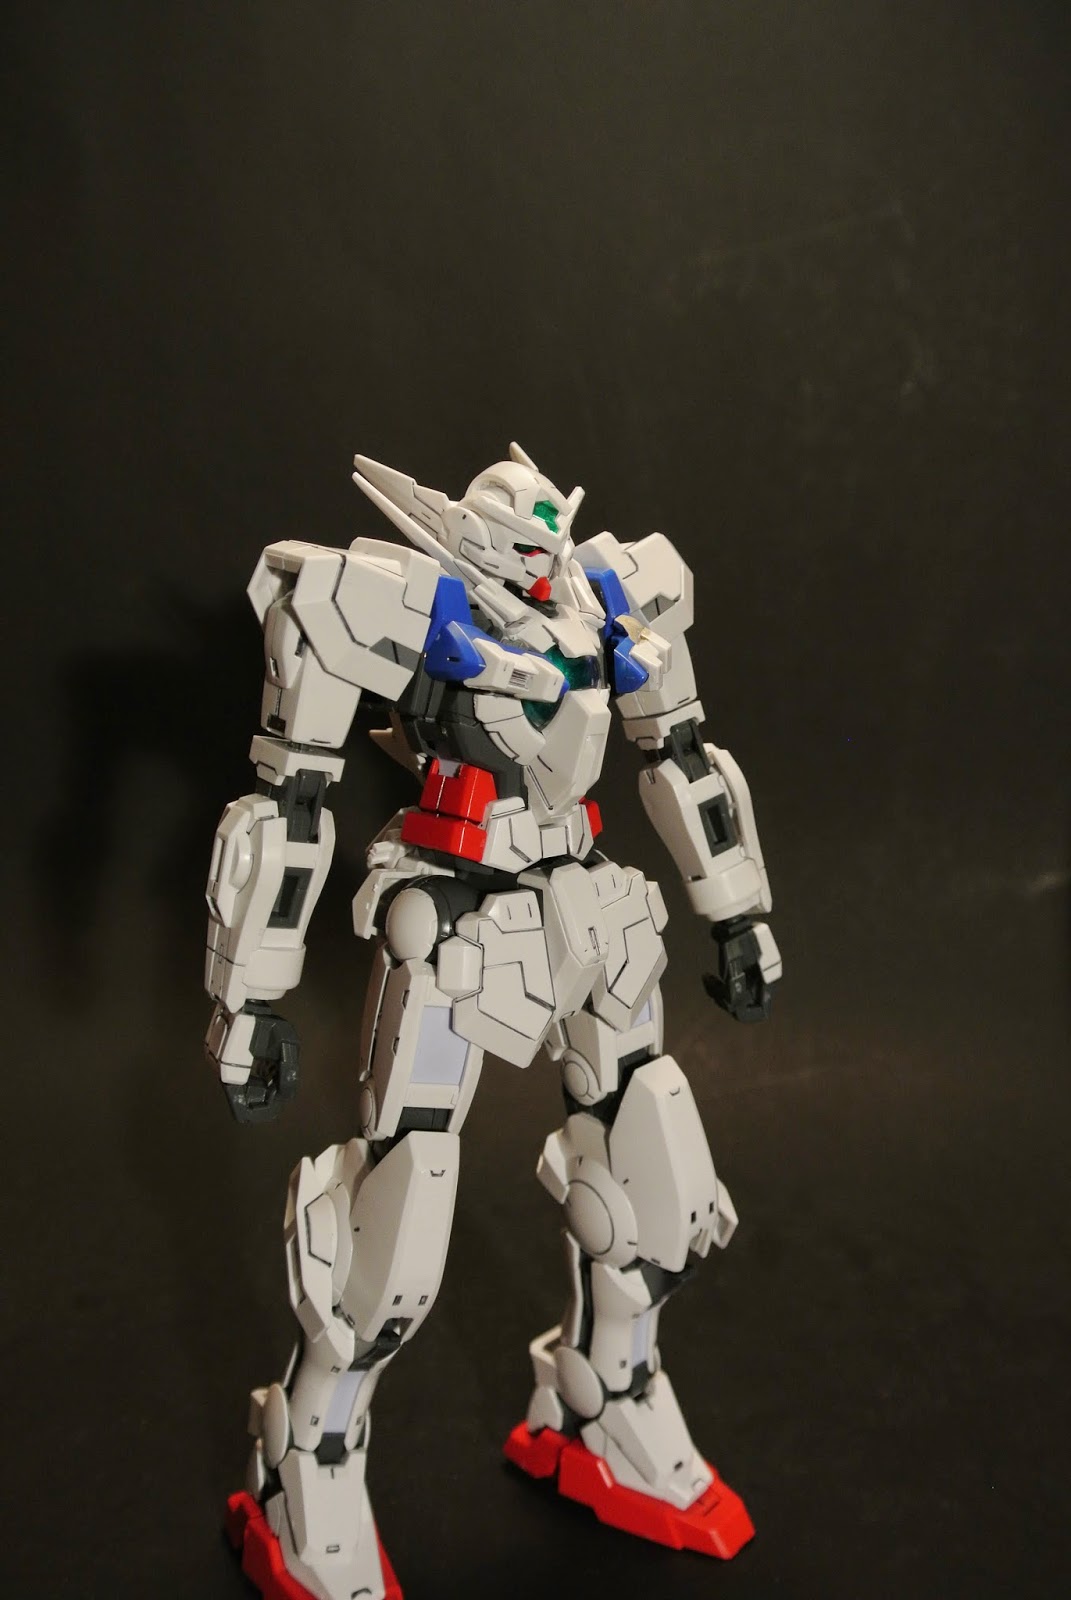
The Astraea comes in White, Blue and Red plastic, with off white/purplish rubber pieces that accent certain parts. It provides you with green stickers for the rifles, the chest piece, and the head piece. It also provides gray stickers to detail certain areas. I opted to paint a few areas with silver paint and metallic green (like the chest) instead of using a sticker.
Unfortunately, the white isn't true to the off white of the Astraea's line art. It looks very nice and clean, but the line art has hints of light light gray and maybe even slight purple.


The GN sword is all gray, so I painted the outer edges with Tamiya Acryllic Titanium Silver. The sword guard also needs gray stickers as well. The shield comes in gray, blue and white pieces.


The guns come in all gray, and use a clear piece with a green sticker on it to create the sight. They could use some paint.


All in all, this kit is of very good quality for a NG. The joint pieces are definitely a step up from the NG SEED/SEED DESTINY line, and are much much better than the Wing line. Even so, the plastic still has that thin feel to it. Some of the armor pieces pop into place, like around the knees/thighs without any pegs and are just asking to pop off. Not sure why they would do that. Other pieces are meant to come off, like the spikes on the neck area, so you can mount the launcher.


The kit offers a lot of panel lining and spots for detailing. If you don't, the kit can end up looking very plain with just the white plastic. The panel lining really makes it pop. However, the kit also has a lot of seam lines that need to be taken care of, especially around the ankles as well.
Pros and Cons


This kit looks great. If you put in the TLC that it deserves (and needs) it'll look great on your shelf. With all the detailing that you can put in, you can really make it stand out. The weapons are really cool, and attach to the forearms so holding is much more secure. The multiple beam sabers are pretty unique, and you can have a bunch of play styles and poses.
Besides that, this kit has a very awesome design in its own regard. There aren't too many color mistakes, and it looks very clean upon finish. It's not heavy, and it even comes with an action base adapter so you can pose it on an Action Base #1
Its not a difficult kit, but it still has a lot of parts and will take up a good amount of time to finish, especially if you put in all that effort to detail and make it look good. That being said, it is not a frustrating kit to build. Its easy, will take up a good chunk of time, and will look great when you're finished.


Unfortunately this is still a NG 1/100 kit. It has similar problems to the other NG 1/100 kits. Even though it has some very nice improvements to its predecessors, I found some annoying pieces that might turn you off from this kit.
Some sections that require a polycap clamped between two pieces won't fit together properly, or will take a lot of fidgeting to get it right, (hopefully before you crush one section of the polycap connection...)
The hands pop off fairly easily on the ball joints, and don't seem to flush deep enough into the wrists.
The legs pose fairly well, but cannot maintain lower crouched poses without a lot of adjusting.
The thigh joints are fairly loose and can cause the kit to split when trying to pose.
Some armor pieces pop off because they don't connect well.
Verdict


I would totally get this kit because of its design, and how unique it is. Until Bandai releases an MG Astraea this is the best you're going to get. With all of its problems, once you get it just right, it'll look awesome, and it gives you an adapter to alleviate some of its posing issues. If you like big swords like me, and the 00 line, this is a great kit to add. Once I finish my MG Exia I'll be looking forward to having my lineage up to the 00 Gundam.
Additional Comments/Photos


The Sword is probably my favorite thing, having an underslung blade is just too awesome.


The Beam rifle also deviates from the norm, and looks pretty unique attaching to the arm as well.


You can get some cool poses, but then you can also end up getting some derpy ones, bending joints in certain ways to try to reach weapons or whatnot.

Here are the leftover pieces that I suspect you may be able to fashion together the Exia, only without its weapons.
I'm glad I got this kit, but I'll be disappointed in it if they release an MG... But i'm very happy with my purchase.
Until next time!


